|
Having selected a symbol (single size) fixture, the View Fixture screen will display.
.png)
|
-number-1.png)
|
Edit fixture graphic
|
|
Add, edit and remove lines, shapes, text and merchandisable areas
|
|
|
-control-1.png)
|
|
-number-2.png)
|
Fixture attributes
|
|
View and assign fixture attributes (relevant permissions are required to assign attributes)
|
|
|
-control-2.png)
|
|
-number-3.png)
|
Edit fixture details
|
|
Amend details of the fixture, including whether the fixture is merchandisable
|
|
|
-control-3.png)
|
|
-number-4.png)
|
Delete fixture
|
|
Delete the fixture from RVM
|
|
|
-control-4.png)
|
|
-number-5.png)
|
Fixture size attributes
|
|
View and assign fixture size attributes (relevant permissions are required to assign attributes)
|
|
|
-control-5.png)
|
|
-number-6.png)
|
3D models
|
|
View and assign a 3D model to the fixture for use in the 3D layout view
|
|
|
-control-6.png)
|
|
-number-7.png)
|
Edit fixture size details
|
|
Amend the details of the fixture size
|
|
|
-control-7.png)
|
|
-number-8.png)
|
Delete fixture size
|
|
Delete the fixture size from RVM
|
|
|
-control-8.png)
|
To edit the fixture details:
.png)
To edit the fixture size details:
.png)
If only part of the fixture is merchandisable, the fixture should not be defined as merchandisable but instead a merchandisable area should be added.
On the View Fixture screen, click to Edit the Fixture Graphic.
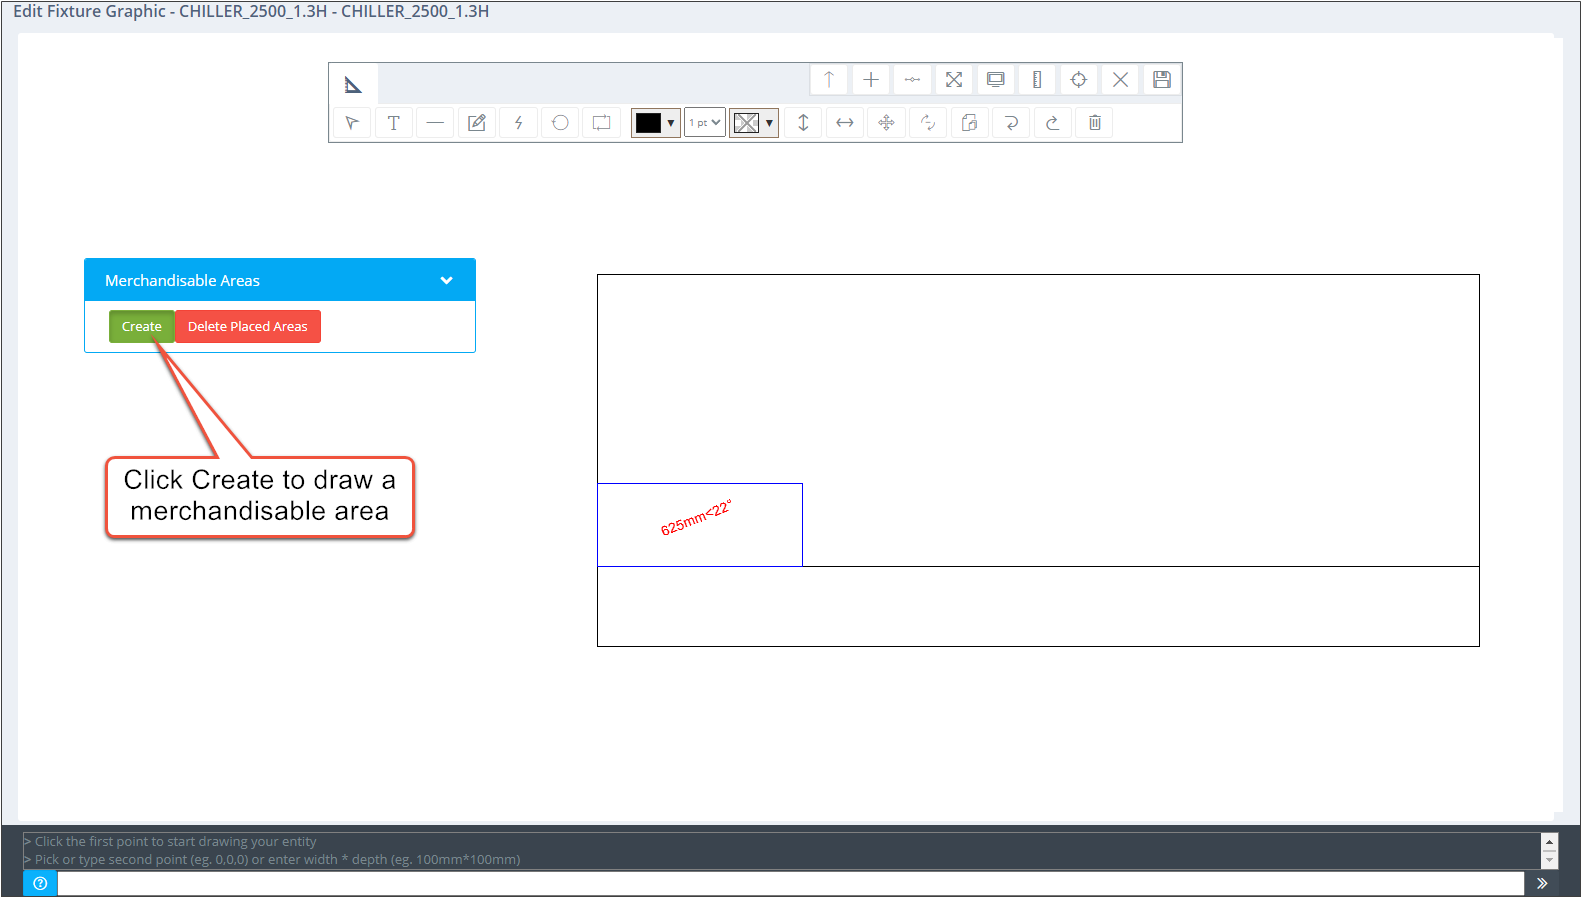
Merchandisable areas are rectangular. To draw, click where the rectangle should start, drag the cursor to draw the rectangle then click a second time to finish the rectangle. To get an area of a particular size, the command line can be used to enter the dimensions once the start point has been clicked. Follow the instructions given above the command line.
Once drawn, an arrow will be displayed to show the direction the space will be placed onto the merchandisable area. Generally, a merchandisable area will be wider than it is deep. In this case, drawing the area from bottom left to top right will show the arrow going from left to right.
.png)
However, if the merchandisable area is deeper than it is wide, you should draw the area from bottom right to top left so that the arrow displays from left to right rather than from back to front.
.png)
Multiple merchandisable areas can be added to a fixture if required.
Save any changes once complete using the Save icon on the toolbar.
|